View Budget Lines
| Date Created | October 15, 2018 |
|---|---|
| Process Name | View Budget Lines |
| Version Number | C |
| Procedure Number | 0003 |
| Process Owner | Questica Users |
| Date of Last Update | April 21, 2023 |
| Purpose | Run a report to view a unit’s budget lines. This report will include all salary and OE budget for a unit but does not have position specific detail. |
|---|---|
| Scope | Scope of this document pertains to Sonoma State University's version of Questica Budgeting software. |
| Document Management | University Budget and Resource Planning retains all copies of Business Process Guides and handles distributions |
| Roles and Responsibilities | University Budget and Resource Planning retains responsibility for the accuracy of the information within Questica Budgeting software. |
Process
STEP
SCREENSHOT
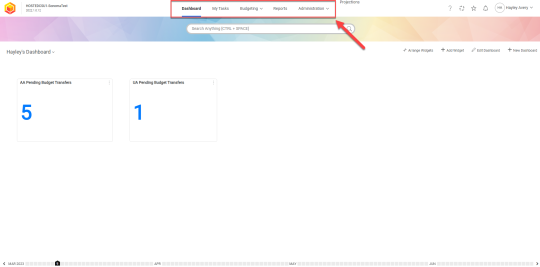
1.To view a budget for a specific unit(s), open the Budgeting Module.
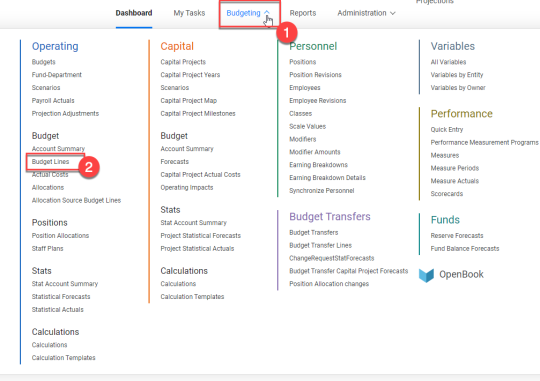
2.Select Budgeting from the menu at the top of the screen (1), then select Budget Lines (2).
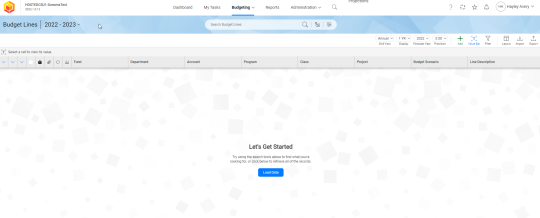
3.The default screen will show no data.
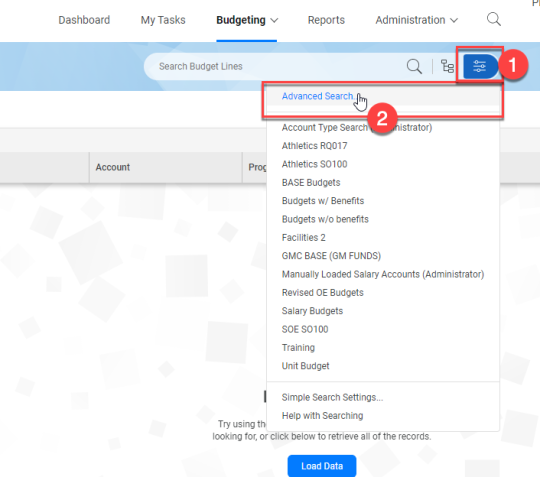
4.Select the Advanced Search icon at the top of the screen.

5. If you have any previously saved reports, you can select those from the drop down shown in square (2).
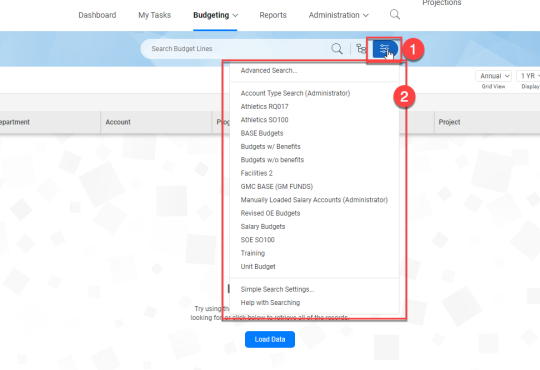
6. If you have no saved reports or would like to create a new one, select Advanced Search from the top of the dropdown (2).
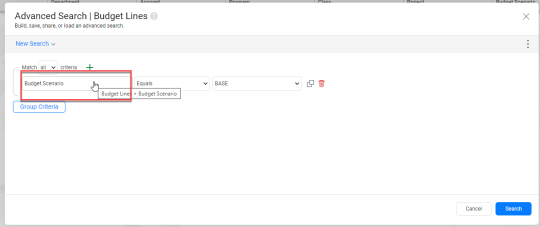
7. Click on the first search box. A field picker box will appear.
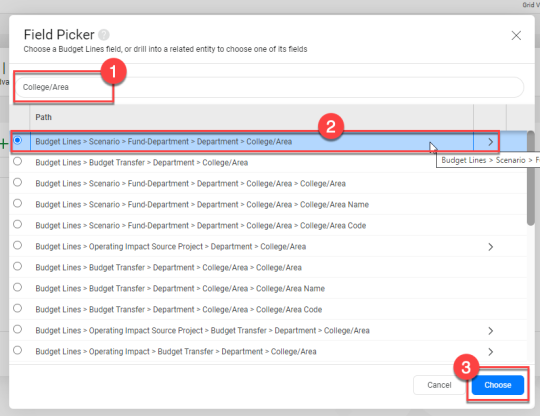
8. In the search bar, type in “college/area” (1). This will allow you to narrow down your search to your unit. Select the top option (2), and click choose in the bottom right corner (3).
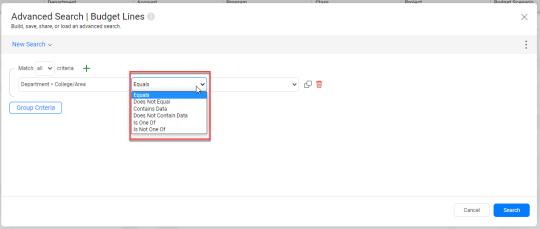
9.In the second search box, select equals from the dropdown.
10. In the third search box, select your unit.
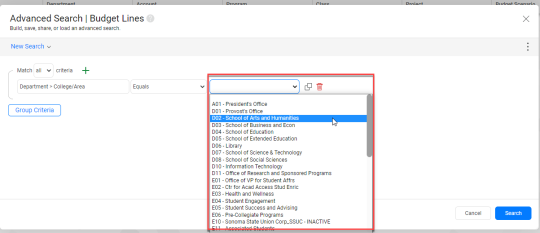
11.Add another search line by selecting the plus button.
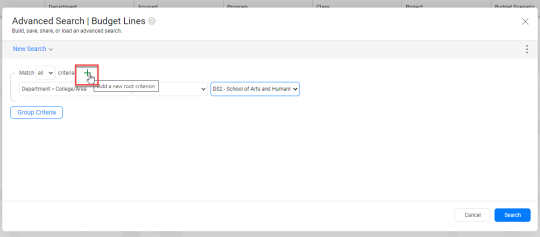
12. Select the first search box on the second line.
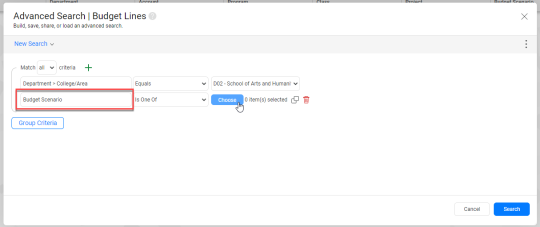
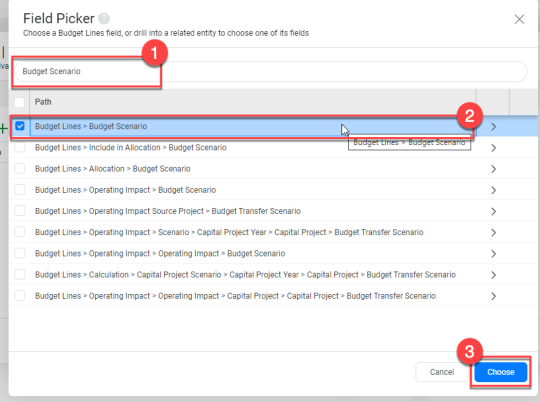
13. In the search bar, type in “budget scenario” (1). Select the top option (2), and click choose in the bottom right corner (3).
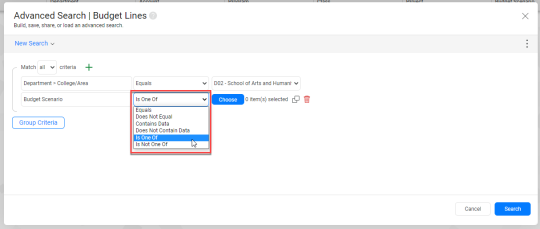
14.In the second search box, select “Is One Of”.
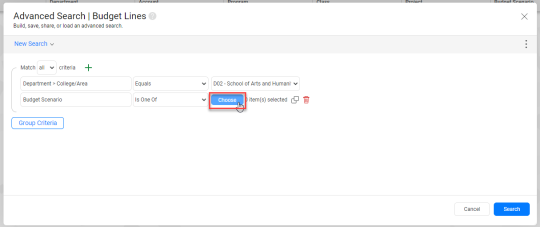
15.In the third search box, select choose.
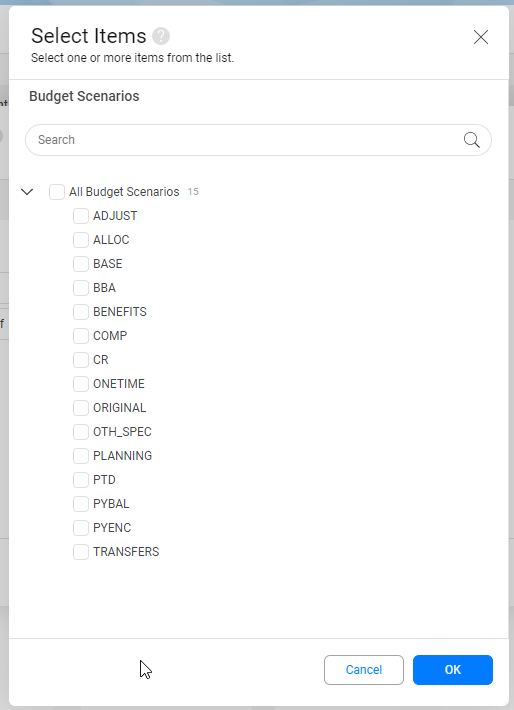
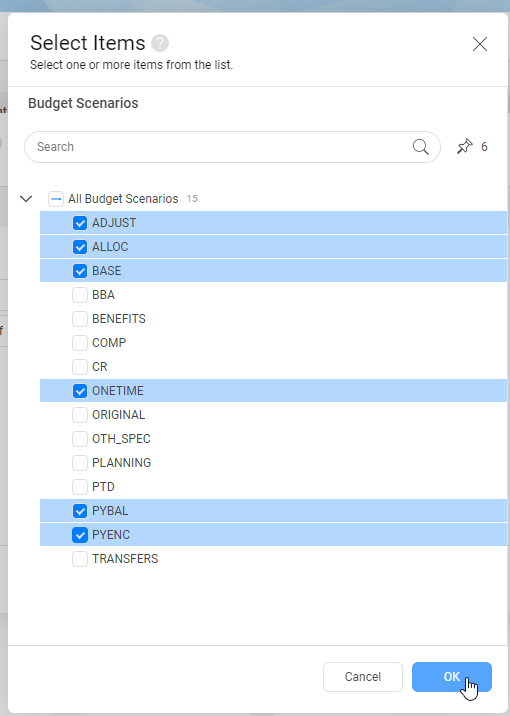
16.The various budget scenarios we use will appear. You can select the scenarios to just view the base budget for your unit, or the scenarios to view the base and revised budgets (see following steps).
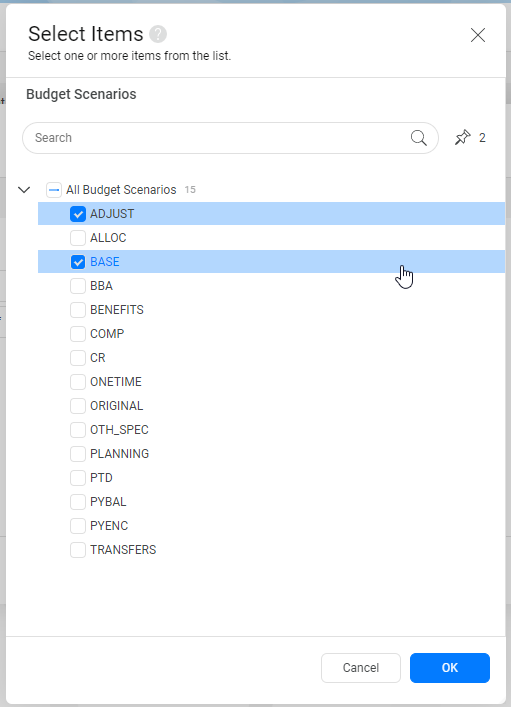
17. Select “Adjust” and “Base” to view base budget only.
18.Select “Adjust”, “Alloc”, “Base”, “Onetime”, “PYBAL”, and “PYENC” to view base and revised budgets.
Once you have selected the appropriate scenarios, select OK.
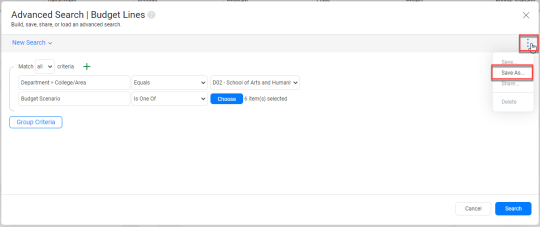
19.To save this search, select the three dots at the top right, and select Save As.
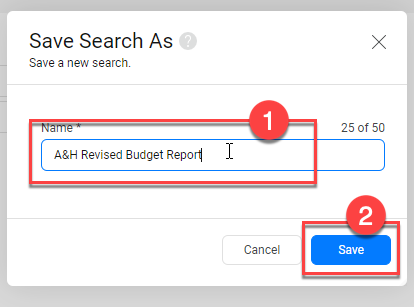
20. Name the report (1), and then select save (2).
21. Once saved, select search to apply the search filters.
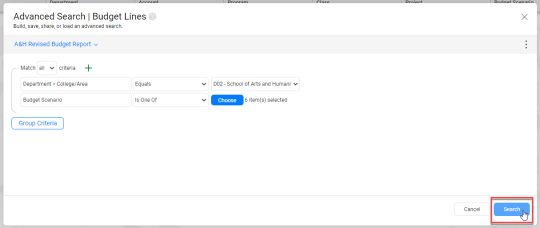
22.Your budgets should appear on the screen.
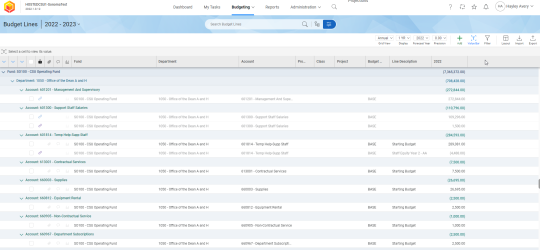
23.To change the layout of the information, select layout from the top right corner.

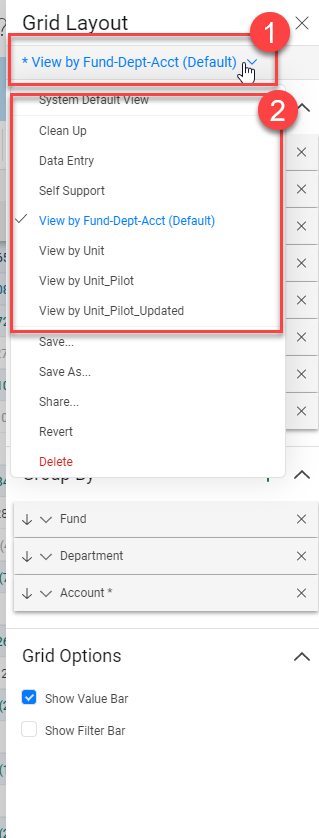
24.To view saved layouts, select the top dropdown (1). You should have a saved layout that the Budget Office has shared with you titled “View by Fund-Dept-Acct”(2).
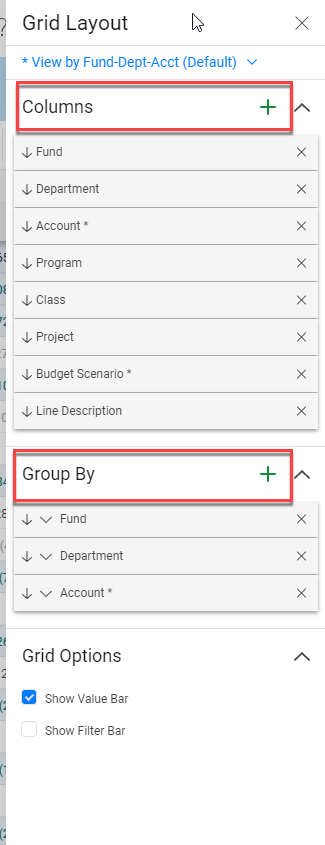
25. If you wish to add or delete any columns, you can do so under the column section.
To change the order of information, you can add, delete, or move around categories in the Group By section.
| Version | C |
|---|---|
| Date of Revision | April 21, 2023 |
| Description of Change Implemented | Process and screenshots updated for new version. |
| Completed by | University Budget and Resource Planning |

