| Date Created | October 17, 2018 |
|---|---|
| Process Name | Layouts and Columns |
| Version | B |
| Procedure Number | 0002 |
| Process Owner | Questica Users |
| Date of Last Update | April 21, 2023 |
| Purpose | Utilizing the layout feature to add columns and move them around to fit your reporting needs and reorganize the group by feature. |
|---|---|
| Scope | Scope of this document pertains to Sonoma State University’s version of Questica Budgeting software |
| Document Management | University Budget and Resource Planning retains all copies of Business Process Guides (BPG) and handles distribution. |
| Roles and Responsibilities | University Budget and Resource Planning retains responsibility for the accuracy of the information within Questica Budgeting software. |
|
STEP |
SCREENSHOT |
|---|---|
|
1.This process can be done on any screen that layouts are an option in the top right screen. |
|
|
2. To adjust the layout or add columns to any screen, select the layout button at the top right of the screen. |
|
|
3. A grid layout box should appear. |
|
|
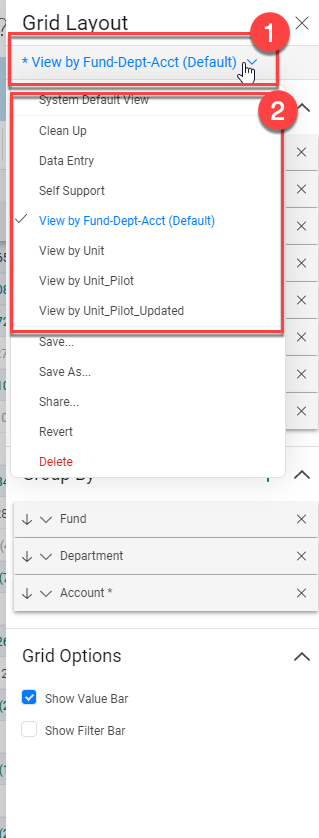
4. To access any saved layouts you have, select the dropdown right below Grid Layout. |
|
|
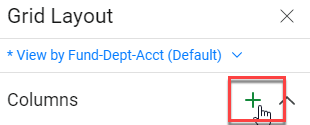
5. To add any columns to your report, select the green Add button next to the Column’s header. |
|
|
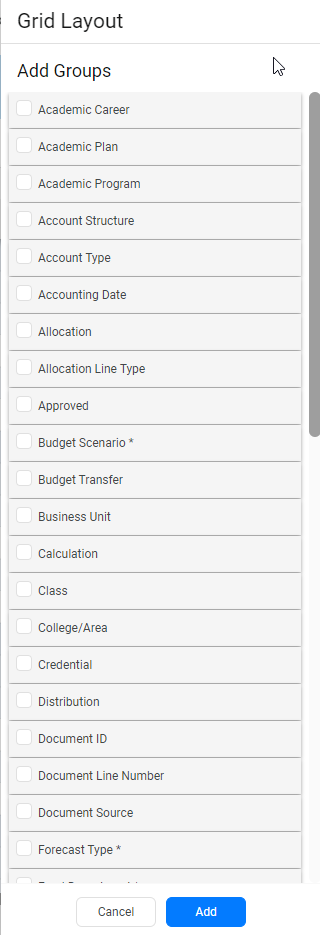
6. Select any columns you would like to add to your report, then click add at the bottom of the menu. |
|
|
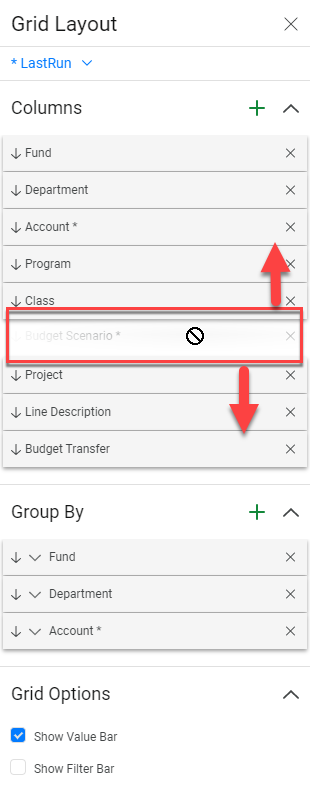
7. You can also click and drag any columns to change the order they appear on your layout. |
|
|
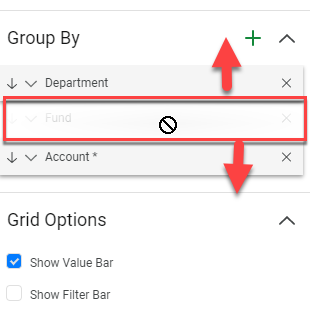
8. You can add or delete any group by fields, by clicking the Add button next to the Group By title. Note- “Group By” is the order the information appears on your report. The second screenshot is an example of the Fund-Department-Account Group By display. |
|
|
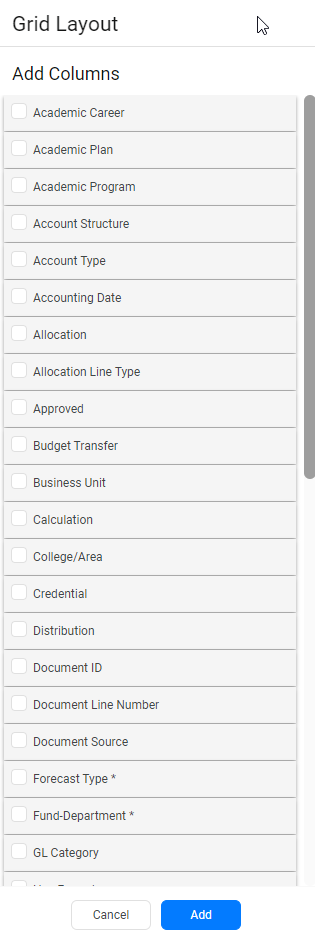
9. Select any fields you would like to add to your group by format, then click add at the bottom of the menu. |
|
|
10. You can also click and drag any group by fields to change the order they appear on your layout. |
|
|
11. To save, any layout you create, select the dropdown arrow at the top of the Grid Layout menu (1), then select Save As (2). |
|
|
12. Title your layout (1), and if wanted, check the box to save as your default, then click Save (2). |
|


| Version | B |
|---|---|
| Revision Date | April 21, 2023 |
| Description of Change Implemented | Updated processes and screenshots |
| Completed By | University Budget and Resource Planning |